Add events to plan and track learning progress
Add a New Event

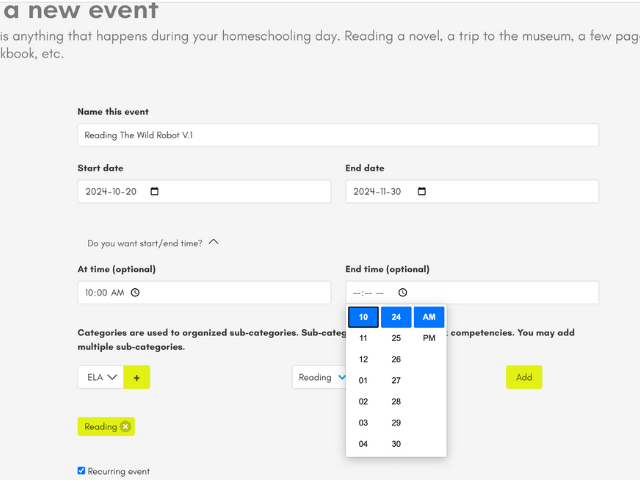
Name this event: this is the name that will appear in your planning and in the generated documents (Reporting tab). You can modify it later.
Start Date - End Date: If it’s a single-day event, you can use the same date for both. If not, enter the start and end dates for a course or your projected school year. This can also be changed later.
Would you like to specify the start/end time?: If you’re working with a precise schedule or for an external course, you can enter the exact time when the event takes place.
Select a category: To help you organize your events and activities in the village, we have a category/subcategory system. The categories are meant for classification, and we suggest using common school subjects like math, science, language, etc.
The subcategories have two functions:
- Like the categories, they help you organize your events and activities. For instance, under the Mathematics category, you could have: Geometry, Algebra, Probability, etc.
- When creating reports and on the learning tracking page (in the Children and Activity Tracking tabs, then in your child’s profile), a record is kept with the grades you enter and the results from any activities you create. You can therefore include in your reports a report card or a progress graph. An event can belong to multiple subcategories.

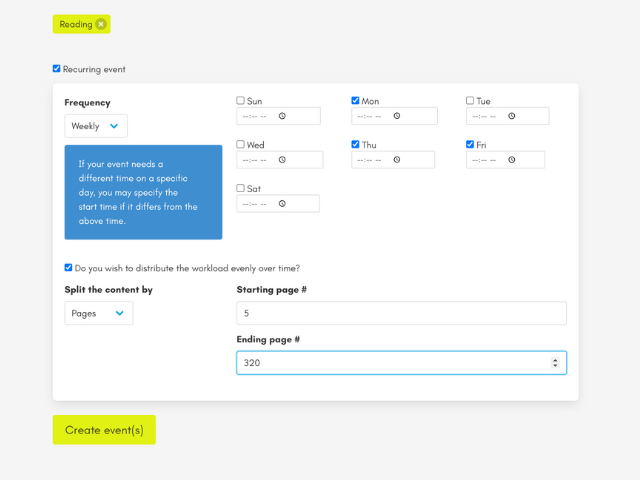
Recurring event: If you want the event to repeat daily or weekly, check the box. Once checked, choose the frequency and the end date that suits you.
Would you like to spread tasks over time?: This option allows you to break down the task over time. You can separate your tasks by page or chapter. For example:
- Separation by page: You are part of a reading circle. Your child needs to finish a 100-page book within 2 weeks. You choose Recurring Event and indicate that reading is planned from Monday to Friday. The novel actually starts on page 4 and ends on page 110. Each day, the child will see where they should be at the end of their reading period to finish on time.
- Separation by chapter: In history, you have a workbook divided into 8 chapters. You decide to do history twice a week. You enter your starting chapter, skipping the first chapter that you already completed last year. So you start with chapter 2 and finish with chapter 8. The software will indicate when it’s time to move on to the next chapter to ensure you finish by your chosen date.